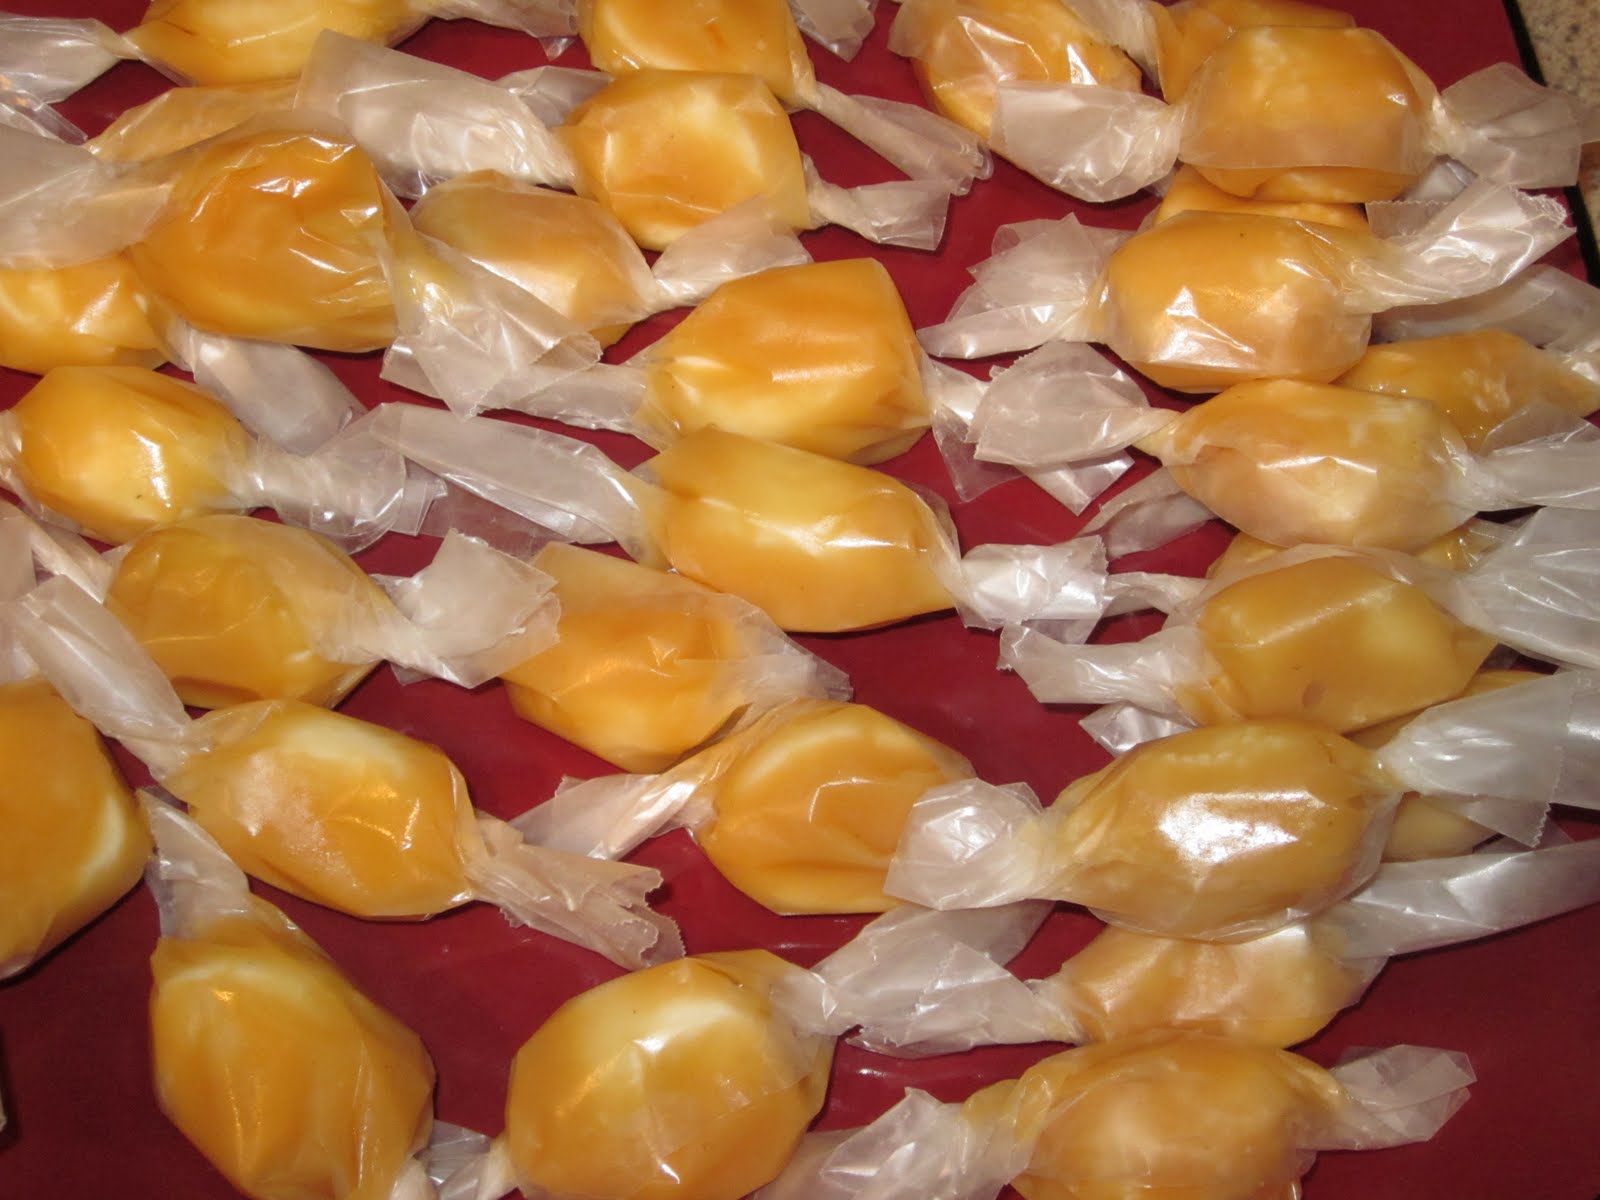
 When I told people that I was making Scotch Kisses most people didn't know what they were. If you are one of those who are not aware, let me tell you. A Scotch Kiss is a marshmallow coated in butterscotch. I have only had them from See's Candy. So good! As you may remember from my last post, I made marshmallows and this is what they are for!
The marshmallows were so easy. The rest was tedious. First, there is the cutting of the wrappers, then the cutting of the marshmallows, the seemingly endless stirring and finally the coating of each marshmallow individually and wrapping. It's a lot of work.
That being said, I made a big mistake while making these: the first 20 or so I immediately wrapped in the wax paper. I read on another blog that they did that and I thought it was a brilliant idea but as some have already guessed, the butterscotch stuck to the wax paper. Most of the Scotch Kisses will be a big mess to eat.
I don't count this whole experience as a failure though. The end result (however messy) is really tasty.

Here's my favorite stirring spoon. Look at my giraffe. I was still fine with stirring at this point.
 It takes a long time to get up to 200 degrees but once it hits there, you notice the thickening.
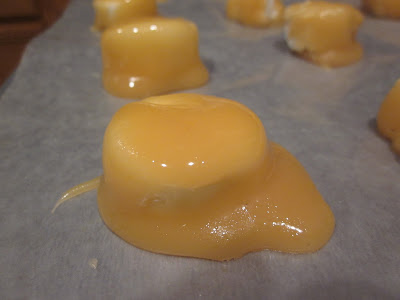
Gooey coated marshmallow. Mmmm
 Scotch Kisses: (Source)
1 pint whipping cream
1 cup granulated sugar
3/4 cup light corn syrup
1/8 tsp salt
1 1/2 (10 oz. each) bags regular marshmallows, cut in half (I used homemade and store bought)
Using kitchen scissors, cut each marshmallow in half through the middle and place them cut-side up on a cookie sheet.
Using a deep medium (heavy, if possible) sauce pan, combine cream, sugar, corn syrup and salt.
Bring mixture to a boil over low heat, stirring constantly. The mixture will start out milky white. The mixture will start to change to a light golden color. Keep your candy thermometer handy so you can get to 235 degrees F. This can take 20-30 minutes (stirring constantly).
Once the butterscotch reaches 235 F, remove from heat and stir until mixture thickens a bit. Let it cool for approximately 5 minutes so it does not melt the marshmallows.
Start dipping your marshmallows (without stabbing them); drop a marshmallow in the mixture, one at a time. (I used little fondue forks). I noticed that the homemade marshmallows need to be coated when the butterscotch is slightly cooler to avoid disintegration. Place the coated marshmallow on a parchment paper lined cookie sheet.
As you get towards the bottom of the pan, the butterscotch may thicken to the point that the marshmallows don't want to coat. If that happens, take the pan back to the stove and heat it over low heat just to rewarm the butterscotch. You don't want to boil it, all you want to do is loosen it up enough to make the butterscotch the same thickness it was when you began dipping. Continue dipping until all the butterscotch is used.
Let the pans of coated marshmallows sit overnight to dry out. Using a butter knife, run the knife under a marshmallow, lift it off of the parchment paper.
Using cut wrappers out of plastic wrap and wrap each candy individually. Lay individual squares of plastic wrap down and place a marshmallow on the center of each piece.
According to the original poster: "If you find the marshmallows are really sticky when you try and peel the wrapping off, you can refrigerate them for a few minutes....I feel they lose a little of their butterscotch flavor when they're chilled."
Good luck and enjoy!
I don't count this whole experience as a failure though. The end result (however messy) is really tasty.

Here's my favorite stirring spoon. Look at my giraffe. I was still fine with stirring at this point.
 It takes a long time to get up to 200 degrees but once it hits there, you notice the thickening.
Gooey coated marshmallow. Mmmm
 Scotch Kisses: (Source)
1 pint whipping cream
1 cup granulated sugar
3/4 cup light corn syrup
1/8 tsp salt
1 1/2 (10 oz. each) bags regular marshmallows, cut in half (I used homemade and store bought)
Using kitchen scissors, cut each marshmallow in half through the middle and place them cut-side up on a cookie sheet.
Using a deep medium (heavy, if possible) sauce pan, combine cream, sugar, corn syrup and salt.
Bring mixture to a boil over low heat, stirring constantly. The mixture will start out milky white. The mixture will start to change to a light golden color. Keep your candy thermometer handy so you can get to 235 degrees F. This can take 20-30 minutes (stirring constantly).
Once the butterscotch reaches 235 F, remove from heat and stir until mixture thickens a bit. Let it cool for approximately 5 minutes so it does not melt the marshmallows.
Start dipping your marshmallows (without stabbing them); drop a marshmallow in the mixture, one at a time. (I used little fondue forks). I noticed that the homemade marshmallows need to be coated when the butterscotch is slightly cooler to avoid disintegration. Place the coated marshmallow on a parchment paper lined cookie sheet.
As you get towards the bottom of the pan, the butterscotch may thicken to the point that the marshmallows don't want to coat. If that happens, take the pan back to the stove and heat it over low heat just to rewarm the butterscotch. You don't want to boil it, all you want to do is loosen it up enough to make the butterscotch the same thickness it was when you began dipping. Continue dipping until all the butterscotch is used.
Let the pans of coated marshmallows sit overnight to dry out. Using a butter knife, run the knife under a marshmallow, lift it off of the parchment paper.
Using cut wrappers out of plastic wrap and wrap each candy individually. Lay individual squares of plastic wrap down and place a marshmallow on the center of each piece.
According to the original poster: "If you find the marshmallows are really sticky when you try and peel the wrapping off, you can refrigerate them for a few minutes....I feel they lose a little of their butterscotch flavor when they're chilled."
Good luck and enjoy!